Category Archives: Setting

centos, windows, eclipse, vscode, etc tools
각종 설정과 관련된 내용을 다룹니다.

[Setting | Ubuntu] Docker 설치

우분투 환경에 Docker 설치 방법을 정리한다.
docker docs


작성일 : 2022-06-08
OS : Ubuntu 22.04 LTS
Docker : 20.10.17

1> Uninstall old version

sudo apt-get remove docker docker-engine docker.io containerd runc

2> Set up the repository

# package index update
sudo apt-get update
# install require package
sudo apt-get install \
    ca-certificates \
    curl \
    gnupg \
    lsb-release
# add GPG key
sudo mkdir -p /etc/apt/keyrings
curl -fsSL https://download.docker.com/linux/ubuntu/gpg | sudo gpg --dearmor -o /etc/apt/keyrings/docker.gpg
# set up repository
echo \
  "deb [arch=$(dpkg --print-architecture) signed-by=/etc/apt/keyrings/docker.gpg] https://download.docker.com/linux/ubuntu \
  $(lsb_release -cs) stable" | sudo tee /etc/apt/sources.list.d/docker.list > /dev/null

3> Install Docker

최신 버전 (20.10.17) 설치

sudo apt-get update

# 설정된 저장소에서 설치가능한 목록확인
sudo apt-cache madison docker-ce
------------------------------------------------------------------------
 docker-ce | 5:20.10.17~3-0~ubuntu-jammy | https://download.docker.com/linux/ubuntu jammy/stable amd64 Packages
 docker-ce | 5:20.10.16~3-0~ubuntu-jammy | https://download.docker.com/linux/ubuntu jammy/stable amd64 Packages
 docker-ce | 5:20.10.15~3-0~ubuntu-jammy | https://download.docker.com/linux/ubuntu jammy/stable amd64 Packages
 docker-ce | 5:20.10.14~3-0~ubuntu-jammy | https://download.docker.com/linux/ubuntu jammy/stable amd64 Packages
 docker-ce | 5:20.10.13~3-0~ubuntu-jammy | https://download.docker.com/linux/ubuntu jammy/stable amd64 Packages
root@opendocs:/etc/apt/keyrings# sudo apt-get update
--------------------------------------------------------------------------

# 특정 버전으로 설치
sudo apt-get install docker-ce=5:20.10.17~3-0~ubuntu-jammy docker-ce-cli=5:20.10.17~3-0~ubuntu-jammy containerd.io docker-compose-plugin
[Setting | Docker] PostgreSQL설치

도커에 PostgreSQL을 설치하는 방법을 정리한다.


작성일 : 2022-06-07

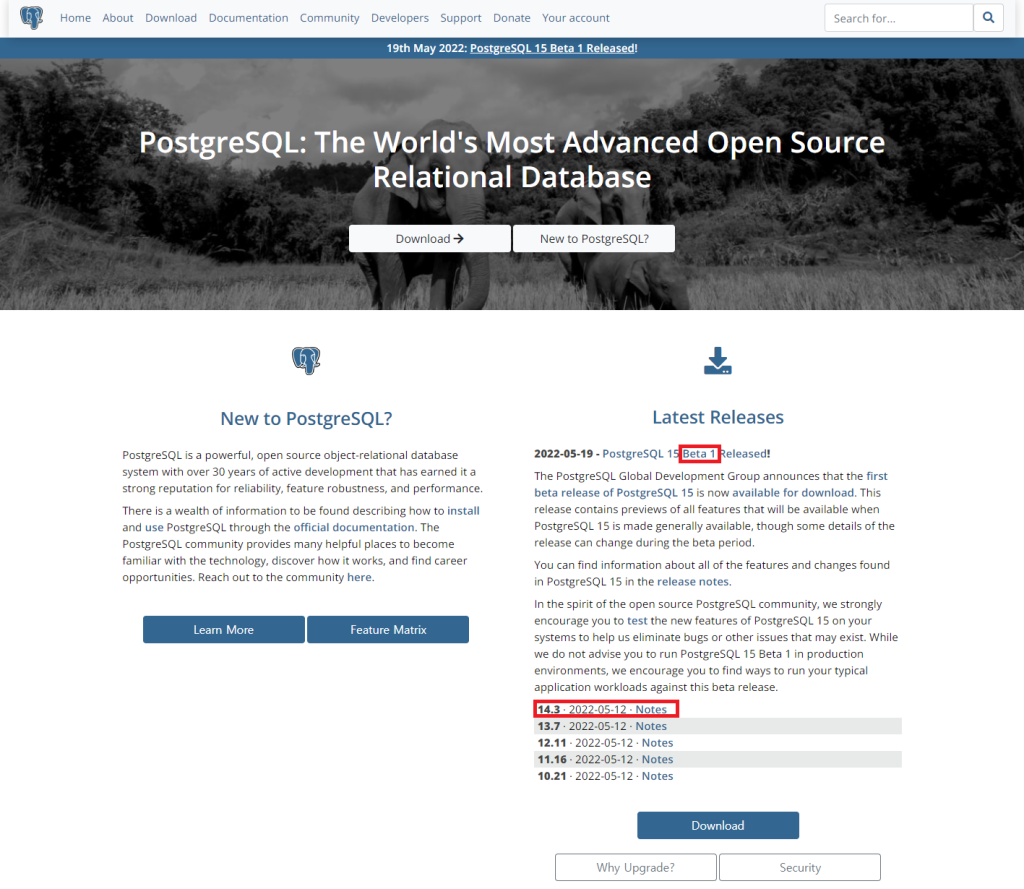
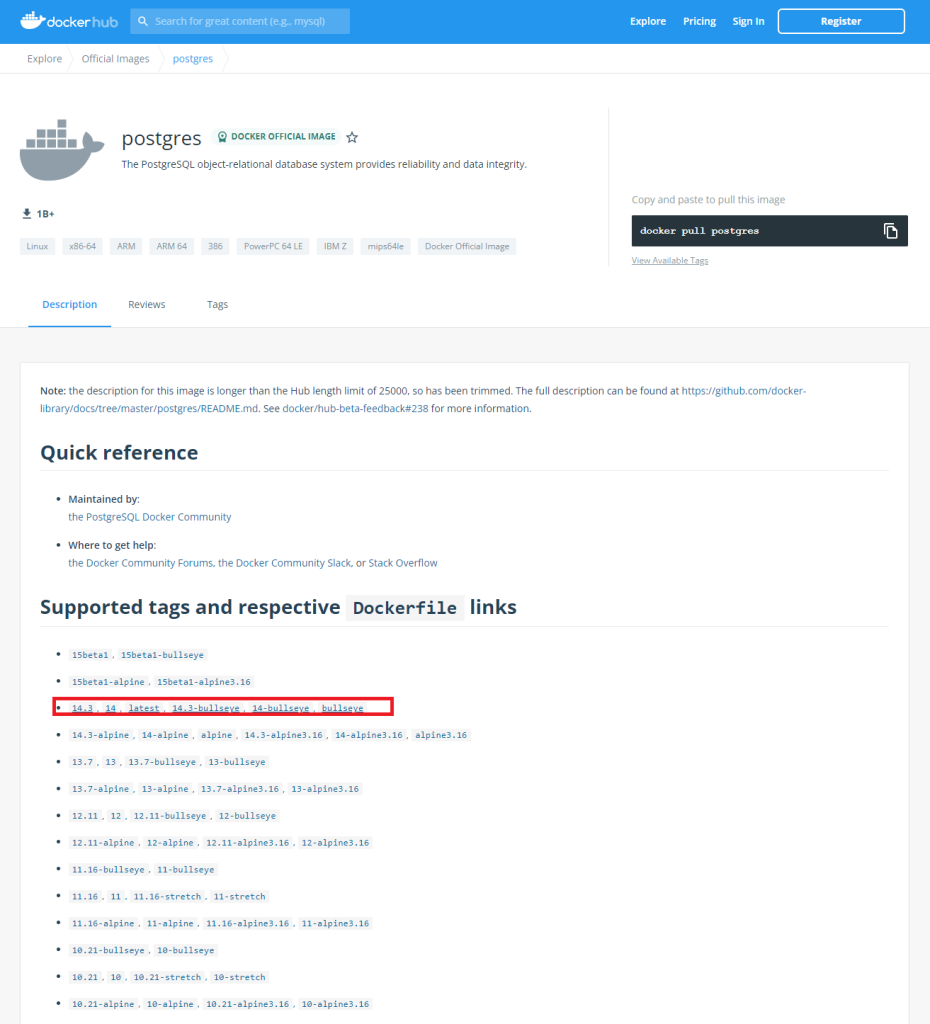
1> 최신 안정화 릴리즈 확인

PostgreSQL 링크

DockerHub > Postgres 링크


2> 컨테이너 설치 및 실행

# 마운트 폴더 생성
sudo mkdir /home/opendocs/postgres
sudo mkdir /home/opendocs/postgres/data

# 네트워크 확인 & opdnet IP 대역확인
sudo docker network ls
# - 없을 경우 생성
sudo docker network create --gateway 172.20.0.1 --subnet 172.20.0.0/21 opdnet
# - 네트워크 확인
sudo docker inspect opdnet
# ------------------------------------------
# IPAM > Config > Gateway와 같은대역 IP 지정해야함
        "IPAM": {
            "Driver": "default",
            "Options": null,
            "Config": [
                {
                    "Subnet": "172.20.0.0/16",
                    "Gateway": "172.20.0.1"
                }
            ]
        },
# Containers에 사용중인 IP는 중복되지 않아야함
        "Containers": {
            "d4c422b0ceb65ab5f45e2efe2c7da3137b7d66a985f3f222b1b974763529ea7c": {
                "Name": "sample",
                "EndpointID": "e0dc778cf7fe452b45c5bec1737050395c553d764de75f3a88aef565fe00166d",
                "MacAddress": "02:42:ac:11:00:02",
                "IPv4Address": "172.20.0.2/16",
                "IPv6Address": ""
            }
        },
# ------------------------------------------

# 컨테이너 설치 및 실행 (고정IP지정)
sudo docker run --detach \
  --network opdnet --ip 172.20.0.104 \
  --name postgres \
  --volume /home/opendocs/postgres/data:/var/lib/postgresql/data \
  -p 5432:5432 \
  -e POSTGRES_PASSWORD=qwer1234 \
  postgres:14.3

3> DB 접속 확인

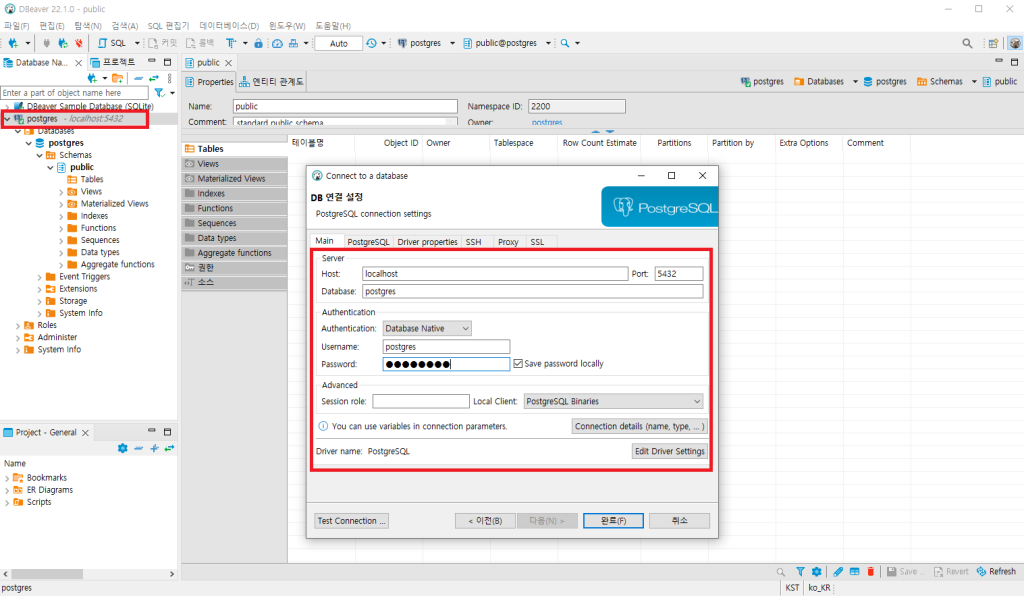
DBeaver 툴을 통해 접속여부확인

[Setting | Ubuntu] 설치 및 기본설정

서버용 우분투 OS를 설치하고 기본 설정하는 과정을 정리한다.


작성일 : 2022-06-07

1> iso 파일 다운로드

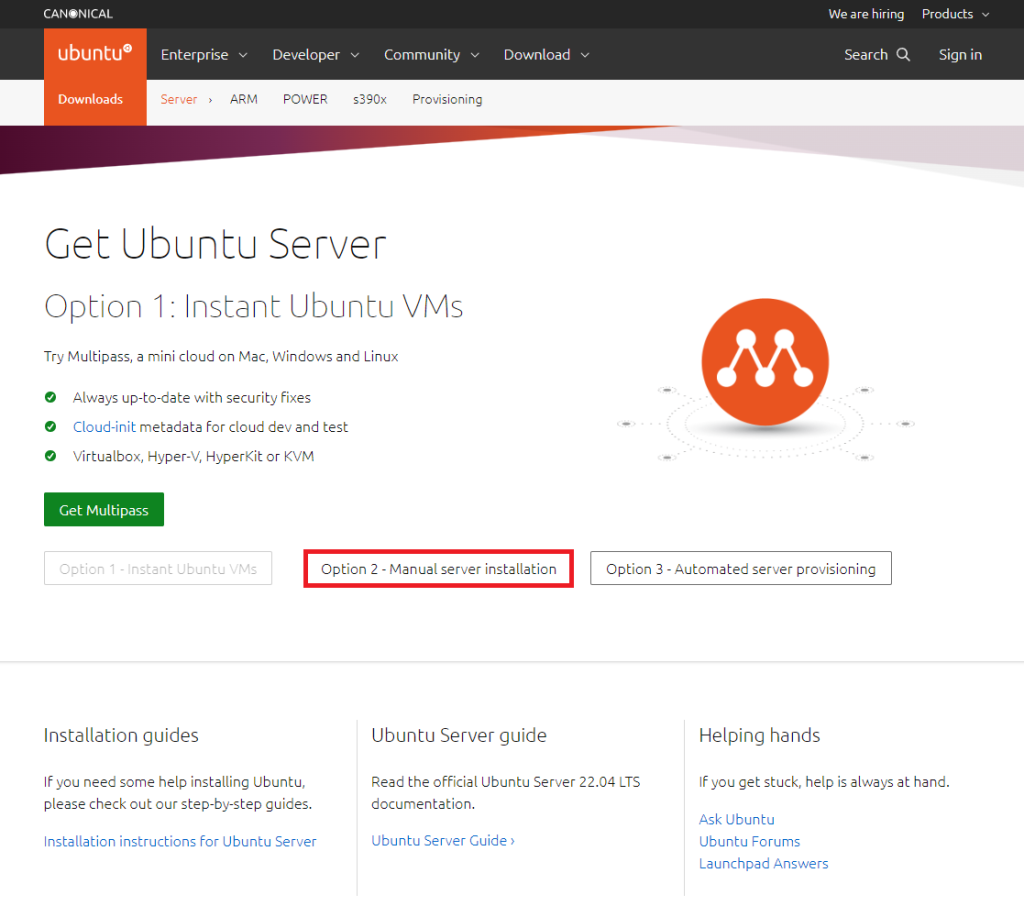
Ubuntu Server Download > Option 2 – Manual server installation

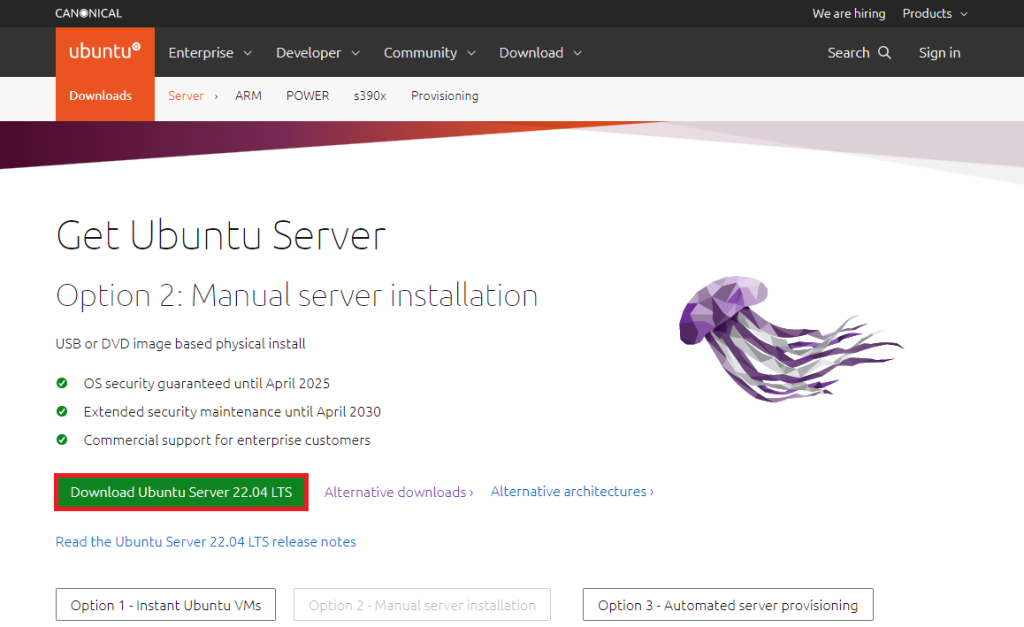
Download Ubuntu Server 22.04 LTS 클릭하면 iso 파일이 다운로드 됨
(ubuntu-22.04-live-server-amd64.iso)


2> iso로 부팅가능 USB 만들기

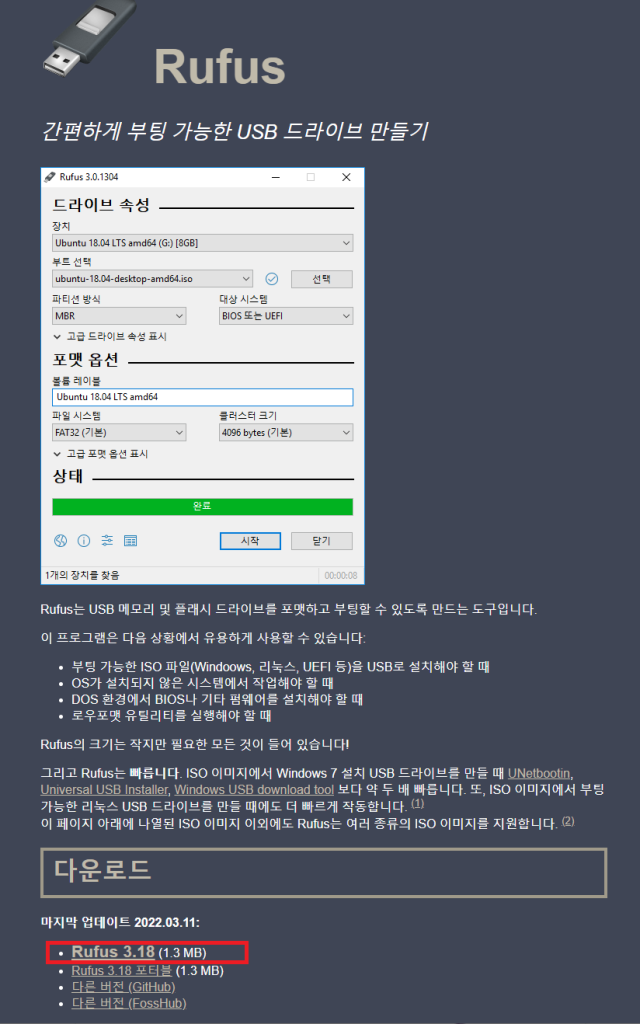
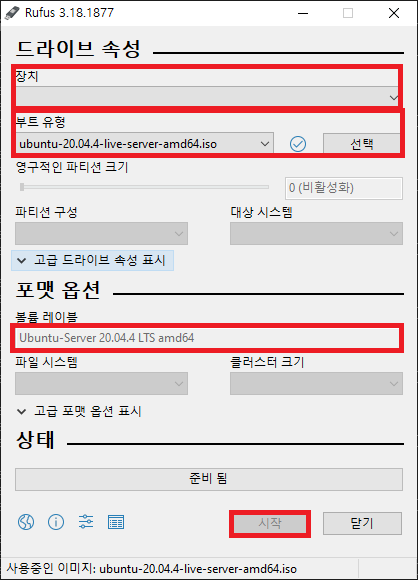
https://rufus.ie/ko/ > 다운로드 > Rufus 3.18 (1.3 MB) 클릭하여 다운로드

‘장치’에는 대상 USB경로 지정하고
‘부트선택’에는 선택 버튼을 눌려 다운받은 iso 경로를 지정한 후 시작 누름


3> usb로 부팅하여 설치 시작

캡쳐 불가하여 문서로 정리

1> Try or Install Ubuntu Server 선택
2> Language : English 선택
3> Layout : English (US) 선택
4> Variant : English (US) 선택
5> Done
6> Ubuntu Server 선택
7> Done
8> 네트워크 설정 & IP 할당 확인 또는 수동등록
9> Configure proxy : 설정하지 않음 > Done
10> Use an entire disk 선택
11> Done
12> 계정 & 비밀번호 설정
13> Install OpenSSH server 체크
14> Done
15> Third-party driver 설치할 드라이버 체크
16> Done
17> Featured Server Snaps 체크하지 않음
18> Done
... 설치가 완료된 후 Reboot Now

4> 설치 완료 후 초기 설정

4-1> root 비밀번호를 설정하여 계정을 활성화

sudo passwd root

4-2> 패키지 업그레이드 및 재시작

# root 권한으로 실행
sudo su
# 패키지 인덱스 업데이트
apt update
# 패키지 업그레이드
apt upgrade -y
# 재부팅
reboot

4-3> 기본 패키지 설치

# root 권한으로 실행
sudo su
# 네트워크 제어
apt install net-tools -y
# 압축
apt install unzip -y

4-4> 타임존 설정

# root 권한으로 실행
sudo su
timedatectl set-timezone Asia/Seoul

4-5> 고정 IP 설정

# root 권한으로 실행
sudo su
작성중...
root@opendocs:/etc/netplan# vi /etc/netplan/01-network-manager-all.yaml
network:
  ethernets:
    enp2s0:  # ifconfig에서 확인되는 네트워크명
      addresses:
      - 192.168.123.201/24
      nameservers:
        addresses: [8.8.8.8, 8.8.4.4]
      routes:
        - to: default
          via: 192.168.123.1
  version: 2

# 설정값 테스트
netplan try
# 설정 적용
netplan apply