Category Archives: Setting

centos, windows, eclipse, vscode, etc tools
각종 설정과 관련된 내용을 다룹니다.

[Setting | Docker] jenkins 설치 내부에서 docker 실행

젠킨스를 도커로 설치하고 내부에서 도커를 실행하기 위한(Docker In Docker) 방법을 정리한다.


작성일 : 2022-05-30

1> 젠킨스 설치시 옵션추가

젠킨스 설치시 아래 옵션을 추가해 도커의 소켓 파일 마운트

# 아래 옵션을 추가함
-v /var/run/docker.sock:/var/run/docker.sock
# 추가하면 아래와 같음
sudo mkdir /home/opendocs/jenkins
sudo docker run \
--name jenkins \
-d \
-p 8888:8080 \
-p 50000:50000 \
-v /home/opendocs/jenkins:/var/jenkins_home \
-v /var/run/docker.sock:/var/run/docker.sock \
-u root \
jenkins/jenkins:lts

2> jenkins container 접속하여 docker-ce-cli 설치

ubuntu OS이지만 컨테이너 OS 는 Debian으로 확인되므로 해당 OS에 맞게 Docker 설치 진행 (Debian Docker 설치)

# jenkins container 접속
docker exec -it jenkins /bin/bash

# linux 버전 확인
cat /etc/issue
# --------------- OS --------------------------------
# root@DESKTOP-R4P59B3:/home/opendocs# cat /etc/issue
# Ubuntu 20.04.4 LTS \n \l
# --------------- jenkins Container OS --------------------------------
# root@DESKTOP-R4P59B3:/home/opendocs# docker exec -it jenkins /bin/bash
# root@8fc963af71bb:/# cat /etc/issue
# Debian GNU/Linux 11 \n \l

# Docker 설치
## - Old Version Remove
apt-get remove docker docker-engine docker.io containerd runc
## - Setup Repo
apt-get update
apt-get install \
    ca-certificates \
    curl \
    gnupg \
    lsb-release
mkdir -p /etc/apt/keyrings
curl -fsSL https://download.docker.com/linux/debian/gpg | gpg --dearmor -o /etc/apt/keyrings/docker.gpg
echo \
  "deb [arch=$(dpkg --print-architecture) signed-by=/etc/apt/keyrings/docker.gpg] https://download.docker.com/linux/debian \
  $(lsb_release -cs) stable" | tee /etc/apt/sources.list.d/docker.list > /dev/null
## - Install Docker Engine
apt-get update
apt-get install docker-ce docker-ce-cli containerd.io docker-compose-plugin
[Setting | Docker] gitlab설치

도커에 gitlab을 설치하는 방법을 정리한다.


작성일 : 2022-05-29

1> 컨테이너 설치 및 실행

# 마운트 폴더 생성
sudo mkdir /home/opendocs/gitlab
sudo mkdir /home/opendocs/gitlab/config
sudo mkdir /home/opendocs/gitlab/data
sudo mkdir /home/opendocs/gitlab/logs

# 네트워크 확인 & opdnet IP 대역확인
sudo docker network ls
# - 없을 경우 생성
sudo docker network create --gateway 172.20.0.1 --subnet 172.20.0.0/21 opdnet
# - 네트워크 확인
sudo docker inspect opdnet
# ------------------------------------------
# IPAM > Config > Gateway와 같은대역 IP 지정해야함
        "IPAM": {
            "Driver": "default",
            "Options": null,
            "Config": [
                {
                    "Subnet": "172.20.0.0/16",
                    "Gateway": "172.20.0.1"
                }
            ]
        },
# Containers에 사용중인 IP는 중복되지 않아야함
        "Containers": {
            "d4c422b0ceb65ab5f45e2efe2c7da3137b7d66a985f3f222b1b974763529ea7c": {
                "Name": "sample",
                "EndpointID": "e0dc778cf7fe452b45c5bec1737050395c553d764de75f3a88aef565fe00166d",
                "MacAddress": "02:42:ac:11:00:02",
                "IPv4Address": "172.20.0.2/16",
                "IPv6Address": ""
            }
        },
# ------------------------------------------

# 컨테이너 설치 및 실행 (고정IP지정)
sudo docker run --detach \
  --network opdnet --ip 172.20.0.101 \
  --hostname opendocs.co.kr \
  --publish 9999:80 --publish 10022:22 \
  --name gitlab \
  --restart always \
  --volume /home/opendocs/gitlab/config:/etc/gitlab \
  --volume /home/opendocs/gitlab/logs:/var/log/gitlab \
  --volume /home/opendocs/gitlab/data:/var/opt/gitlab \
  gitlab/gitlab-ce:latest

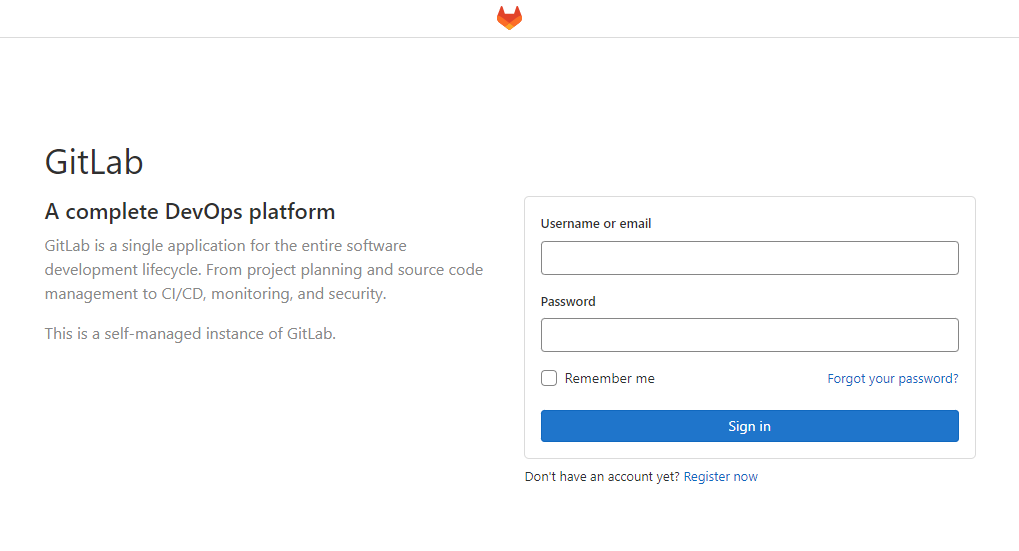
2> 깃랩접속

컨테이너에 접속해서 초기 비밀번호 확인

sudo docker exec -it gitlab /bin/bash
cat /etc/gitlab/initial_root_password

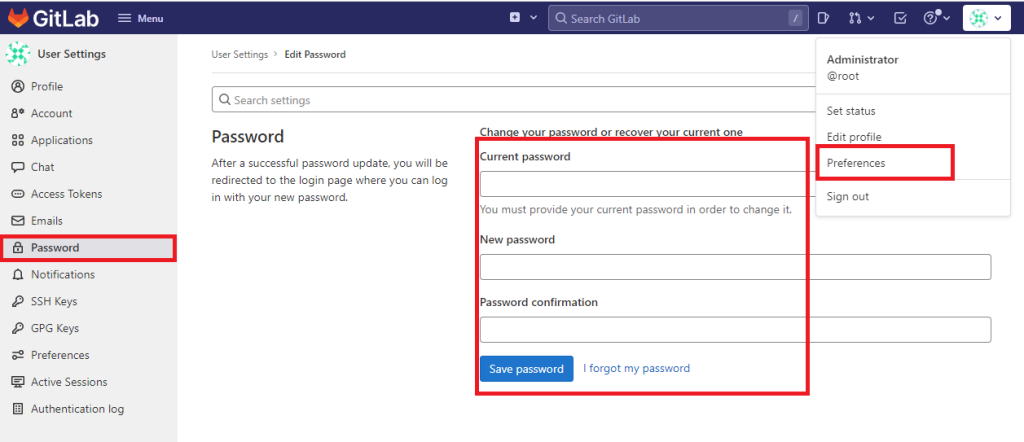
3> 로그인 후 초기 비밀번호 변경

Preperences > Password 메뉴

[Setting | Docker] jenkins 설치

도커에 젠킨스를 설치하는 방법을 정리한다.


작성일 : 2022-05-28

1> 컨테이너 설치 및 실행

# 네트워크 확인 & opdnet IP 대역확인
sudo docker network ls
# - 없을 경우 생성
sudo docker network create --gateway 172.20.0.1 --subnet 172.20.0.0/21 opdnet
# - 네트워크 확인
sudo docker inspect opdnet
# ------------------------------------------
# IPAM > Config > Gateway와 같은대역 IP 지정해야함
        "IPAM": {
            "Driver": "default",
            "Options": null,
            "Config": [
                {
                    "Subnet": "172.20.0.0/16",
                    "Gateway": "172.20.0.1"
                }
            ]
        },
# Containers에 사용중인 IP는 중복되지 않아야함
        "Containers": {
            "d4c422b0ceb65ab5f45e2efe2c7da3137b7d66a985f3f222b1b974763529ea7c": {
                "Name": "sample",
                "EndpointID": "e0dc778cf7fe452b45c5bec1737050395c553d764de75f3a88aef565fe00166d",
                "MacAddress": "02:42:ac:11:00:02",
                "IPv4Address": "172.20.0.2/16",
                "IPv6Address": ""
            }
        },
# ------------------------------------------

# 컨테이너 설치 및 실행 (고정IP지정)
sudo mkdir /home/opendocs/jenkins
sudo docker run \
--name jenkins \
--network opdnet --ip 172.20.0.102 \
-d \
-p 8888:8080 \
-p 50000:50000 \
-v /home/opendocs/jenkins:/var/jenkins_home \
-u root \
jenkins/jenkins:lts

2> 젠킨스 접속

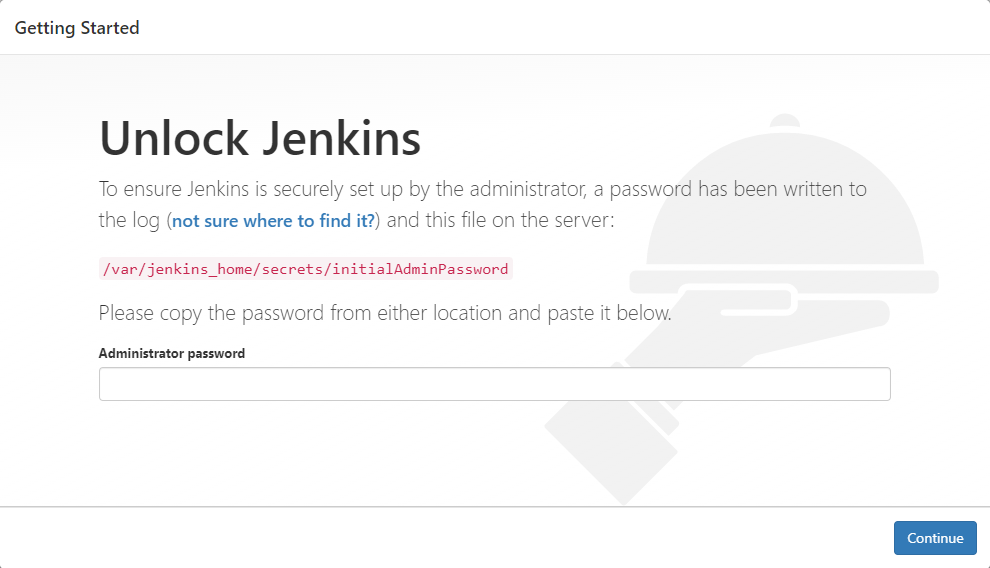
위와 같은 이미지가 뜨면 컨테이너 ID 로그로 비밀번호 확인

# CONTAINER ID 확인
sudo docker ps -a
# log 확인
sudo docker logs [CONTAINER ID]
-----------------------------------------
# 혹은 아래와 같이도 확인가능
## 1. 링크된 볼륨
cat /home/opendocs/jenkins/secrets/initialAdminPassword
## 2. 컨테이너 접속해서 확인
docker exec -it jenkins /bin/bash
cat /var/jenkins_home/secrets/initialAdminPassword
*************************************************************
*************************************************************
*************************************************************

Jenkins initial setup is required. An admin user has been created and a password generated.
Please use the following password to proceed to installation:

XXXXXXXXXXXXXXXXXXXXXXXXXXXXXXXXXXXX

This may also be found at: /var/jenkins_home/secrets/initialAdminPassword

*************************************************************
*************************************************************
*************************************************************

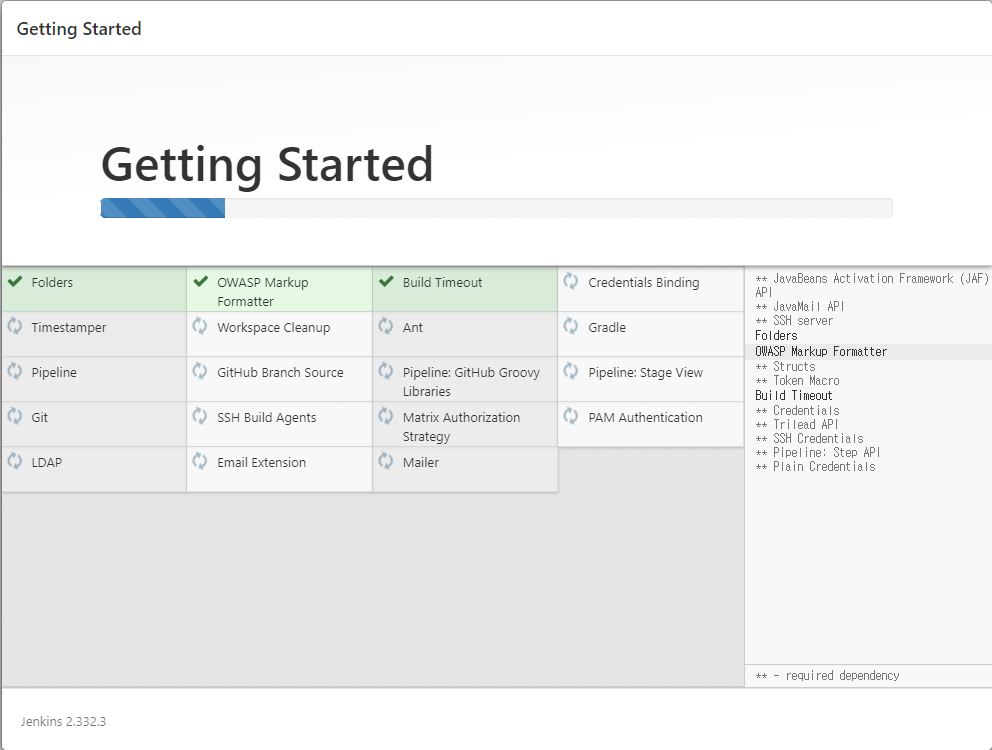
3> 플러그인 설치


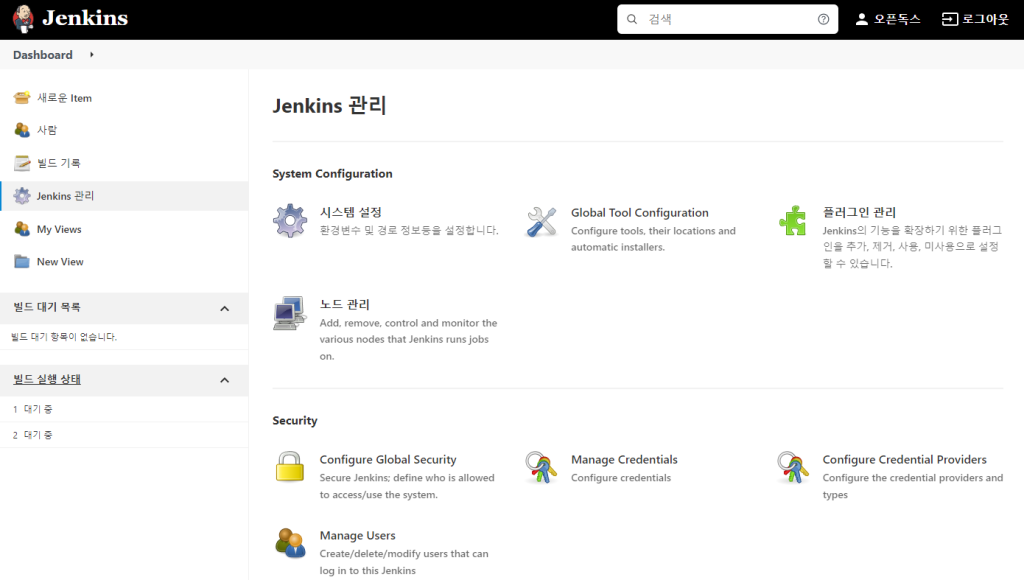
4> 간단한 계정생성과 접속주소 설정을 하면 설치완료