소프트웨어 품질관리를 위한 jenkins, gitlab, sonarqube연동설정법을 정리한다.
작성일 : 2022-05-30
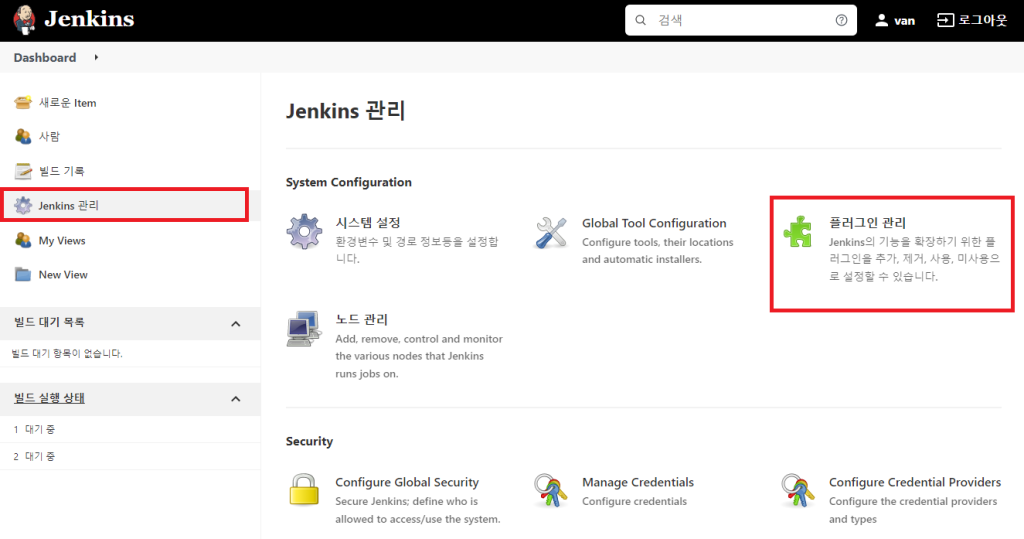
1> jenkins 플러그인 설치
Jenkins 관리 > 플러그인 관리
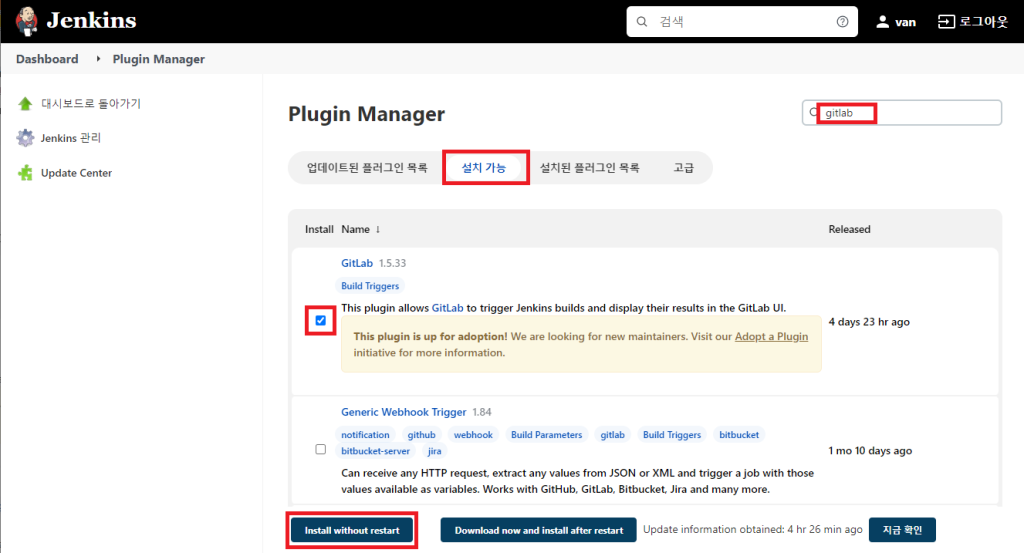
1-1> Gitlab 플러그인 검색하여 설치
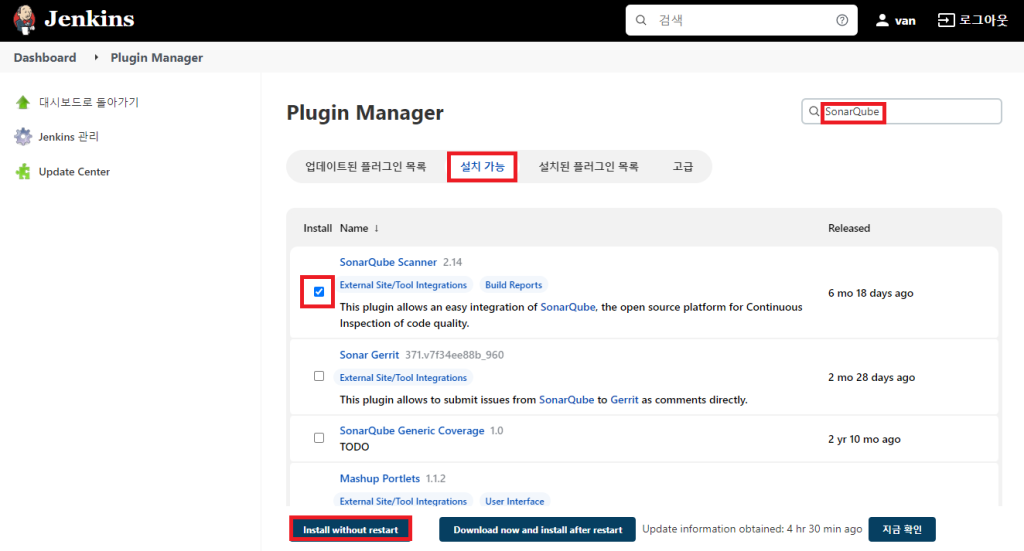
1-2> SonarQube Scanner 플러그인 검색하여 설치
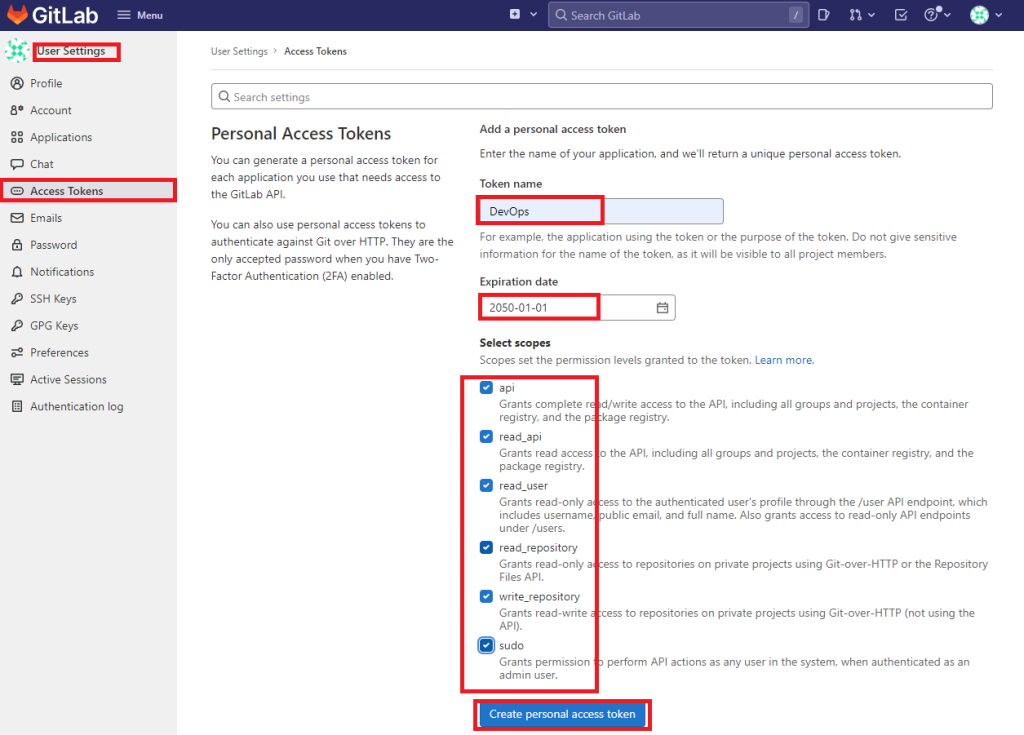
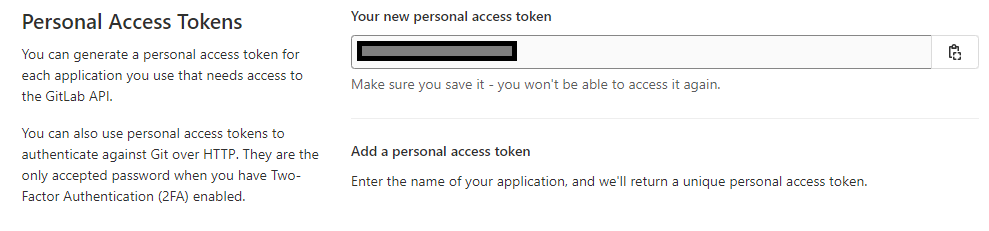
2> GitLab AccessToken 생성
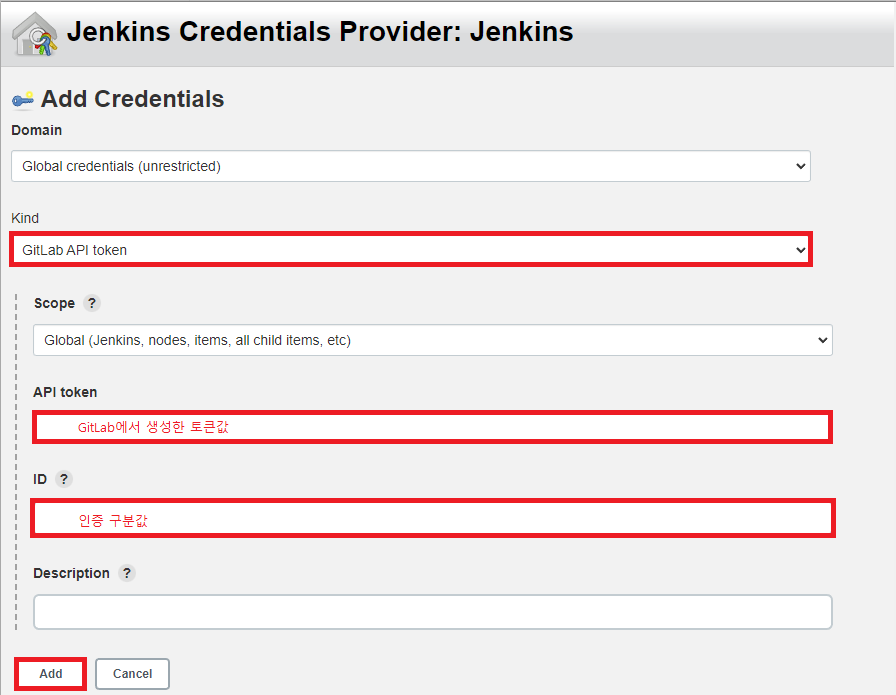
Preferences > AccessTokens 메뉴에서 read_repository, write_repository Scope로 토큰을 생성. 생성된 토큰은 잘 저장해 두어야 함 (재확인 불가)
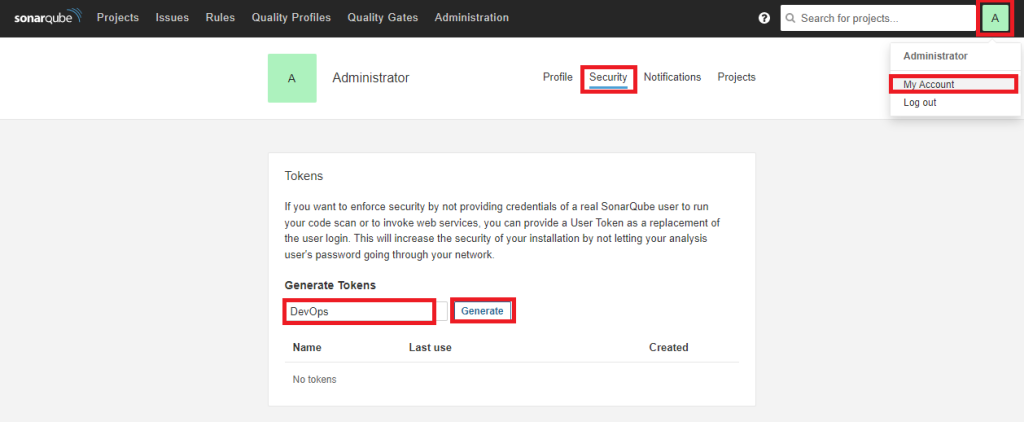
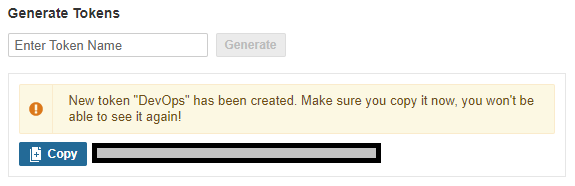
3> SonarQube Token 생성
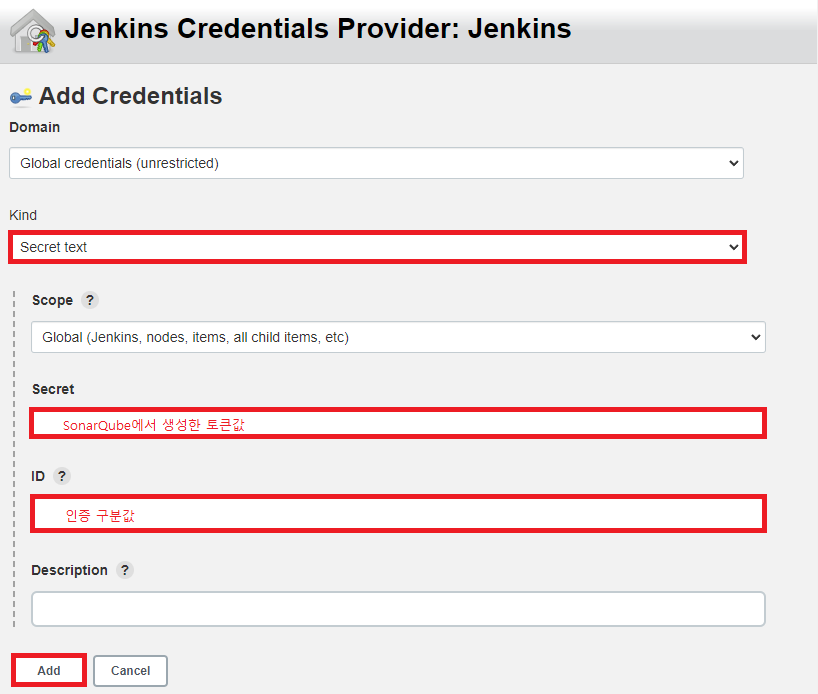
사용자 아이콘 > My Account > Enter Token Name 입력 > Generate.
생성된 토큰은 잘 저장해 두어야 함 (재확인 불가)
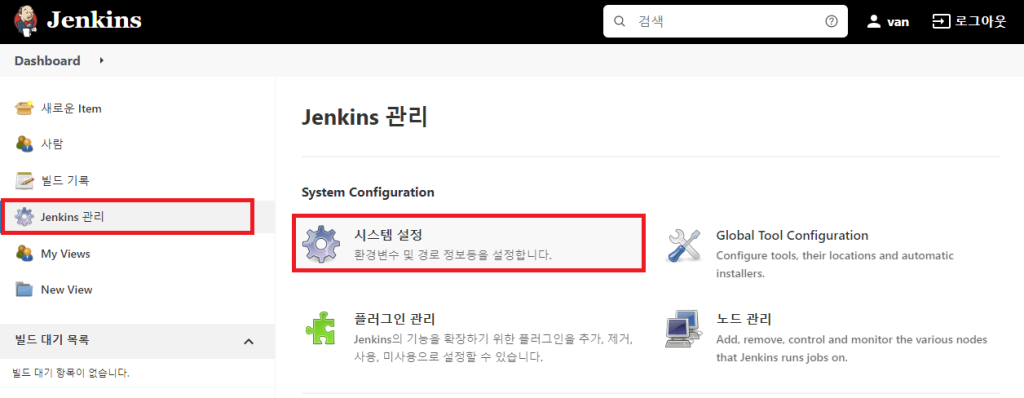
4> Jenkins에 GitLab & SonarQube 토큰 등록
Jenkins 관리 > 시스템 설정
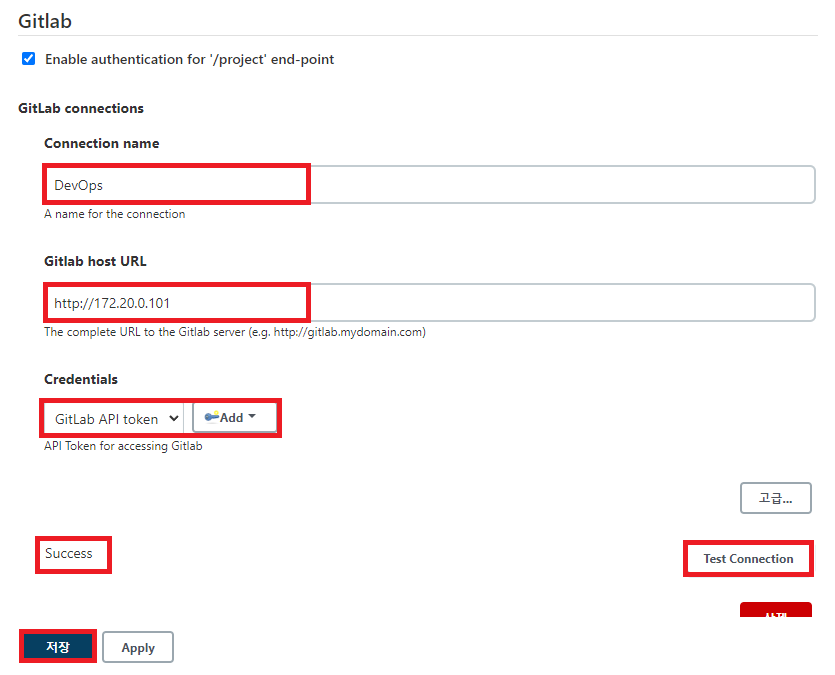
4-1> GitLab 토큰 및 접속정보
‘2>’에서 생성한 토큰 및 접속정보를 입력하고 Test Connection 버튼으로 정상접속 확인
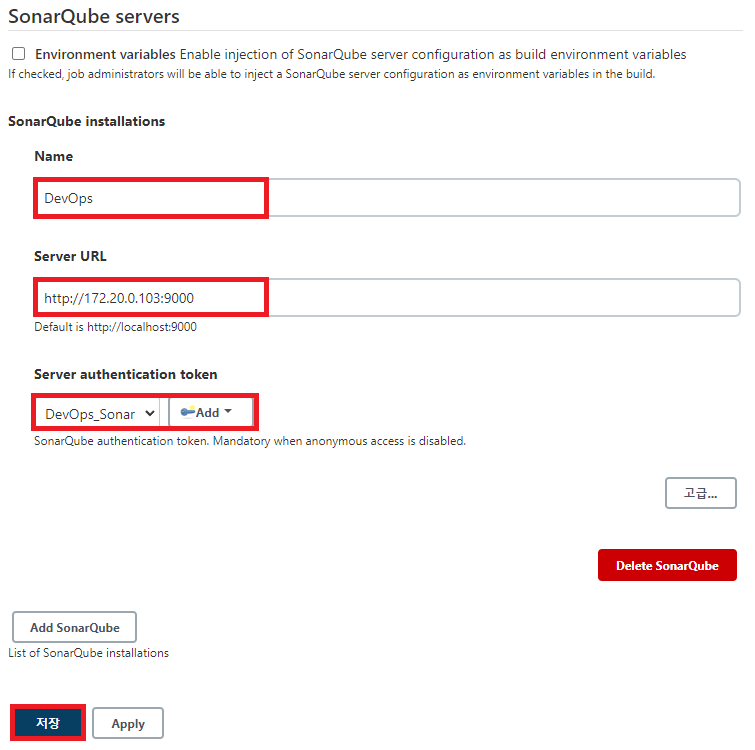
4-2> SonarQube 토큰 및 접속정보
‘3>’에서 생성한 토큰 및 접속정보를 입력하고 Credentials입력시 kind 는 Secret Text로 함
Add 버튼이 동작하지 않는다면 저장 후 다시 들어가보면 동작함
5> Jenkins에 새로운 Item 추가 (Pipeline 유형)

6> Build Trigger 설정
Build Triggers > Build when a change is pushed to GitLab. 체크
고급 클릭 > Secret token > Generate 클릭
생성된 토큰 값은 잘 저장해 두어야함.
하단 저장 버튼 클릭하여 설정값 저장
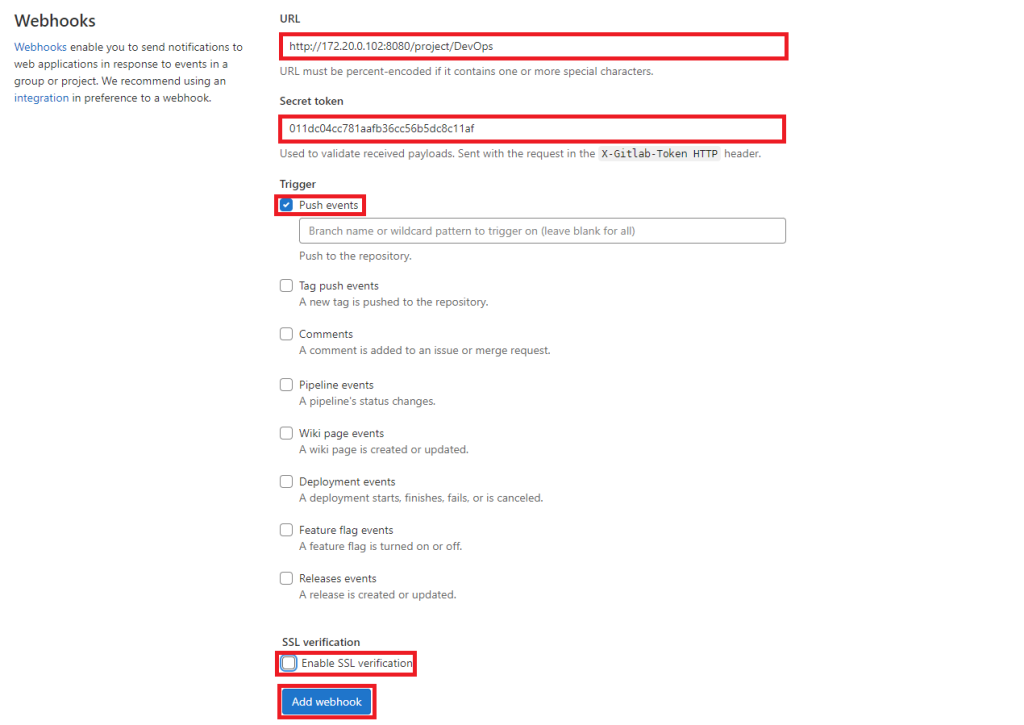
7> Build Trigger와 GitLab에 생성된 project 연결
Project > Settings > Webhooks에서 아래와 같이 설정
URL : 젠킨스에서 생성한 프로젝트 URL (Server to Server IP + 6>에서 주소확인)
Secret token : 젠킨스에서 생성한 프로젝트 Token (6>에서 생성한 토큰)
Enable SSL verification은 체크해제
Add webhook 버튼을 클릭하면 해당 저장소 푸시 이벤트시 젠킨스가 동작
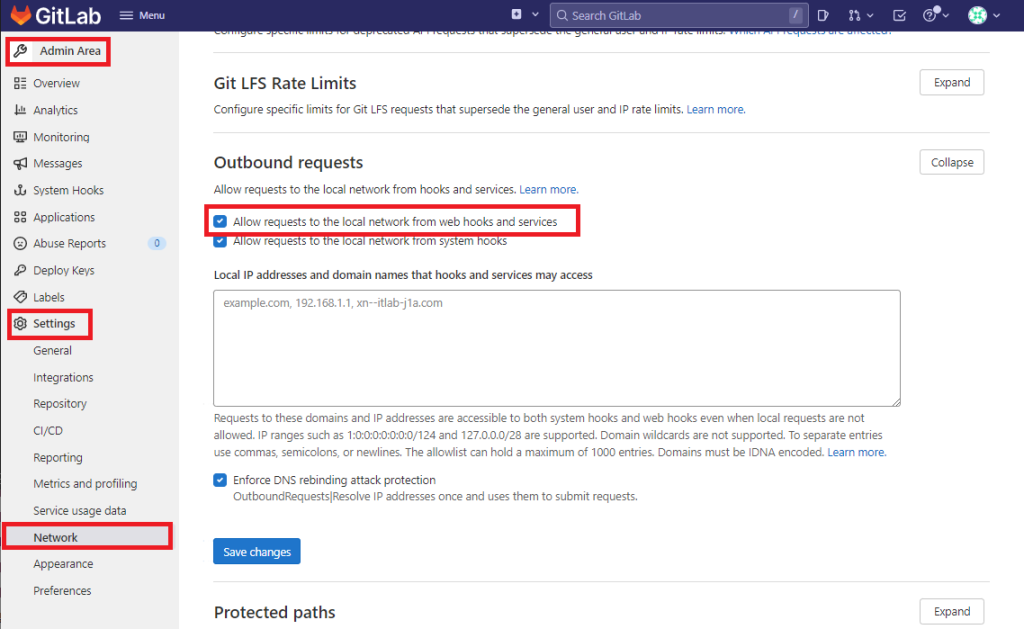
8> Url is blocked: Requests to the local network are not allowed 에러 발생시
Admin Area > Settings > Network > Outbound requests
Allow requests to the local network from web hooks and services 체크
Save Changes 버튼 클릭
9> GitLab > Jenkins 연동 완료
여기까지 설정이 완료되면 GitLab에 푸시 발생시 Jenkins DevOps 아이템이 실행됨
상세한 설정에 관해서는 별도 작성
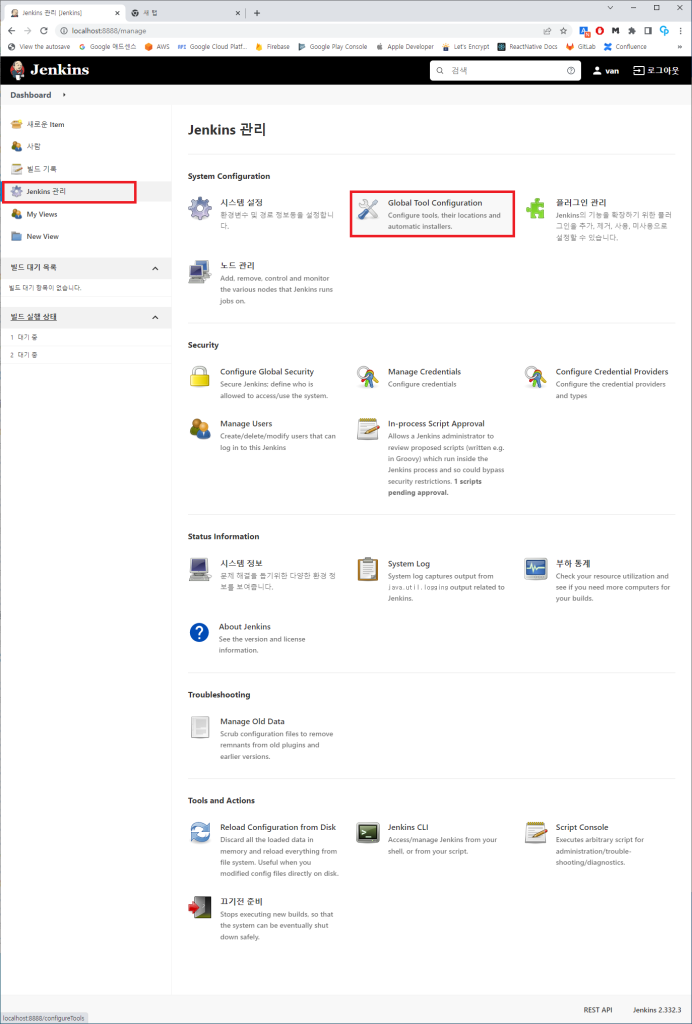
10> Sonar Scanner 설정
Jenkins 관리 > Global Tool Configuration
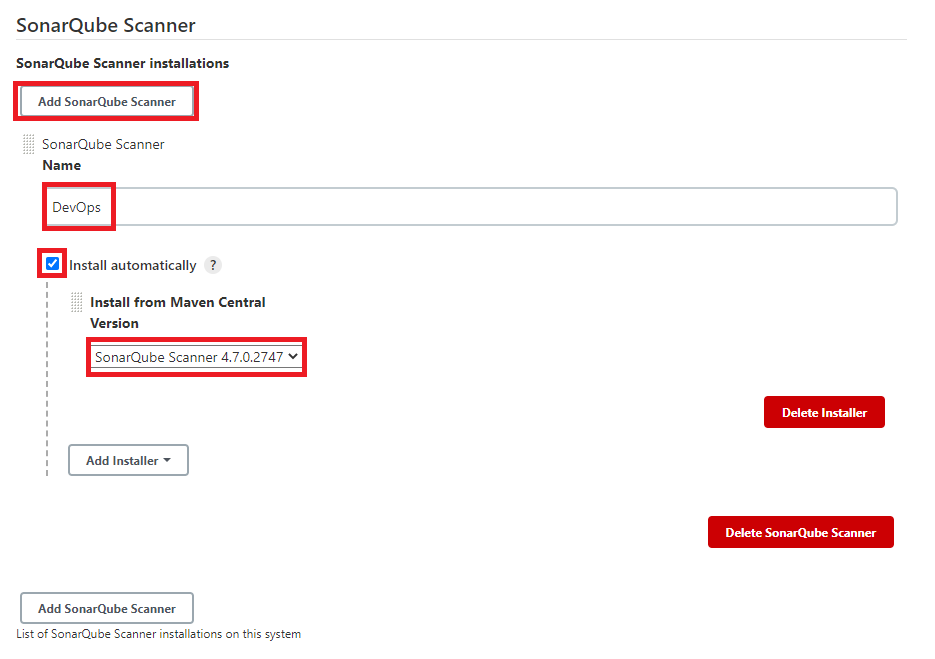
SonarQube Scanner > Add SonarQube Scanner 클릭 > Name 입력 및 Install automatically 체크
11> 소나큐브에 프로젝트 생성 & 프로젝트 루트에 프로퍼티 생성
Manually > Locally 로 생성
빌드환경 / OS 를 선택
설명대로 분석설정 파일을 프로젝트 루트에 생성 (sonar-project.properties)
상세한 설정방법은 메뉴얼 참고 (http://localhost:7777/documentation/analysis/scan/sonarscanner/)

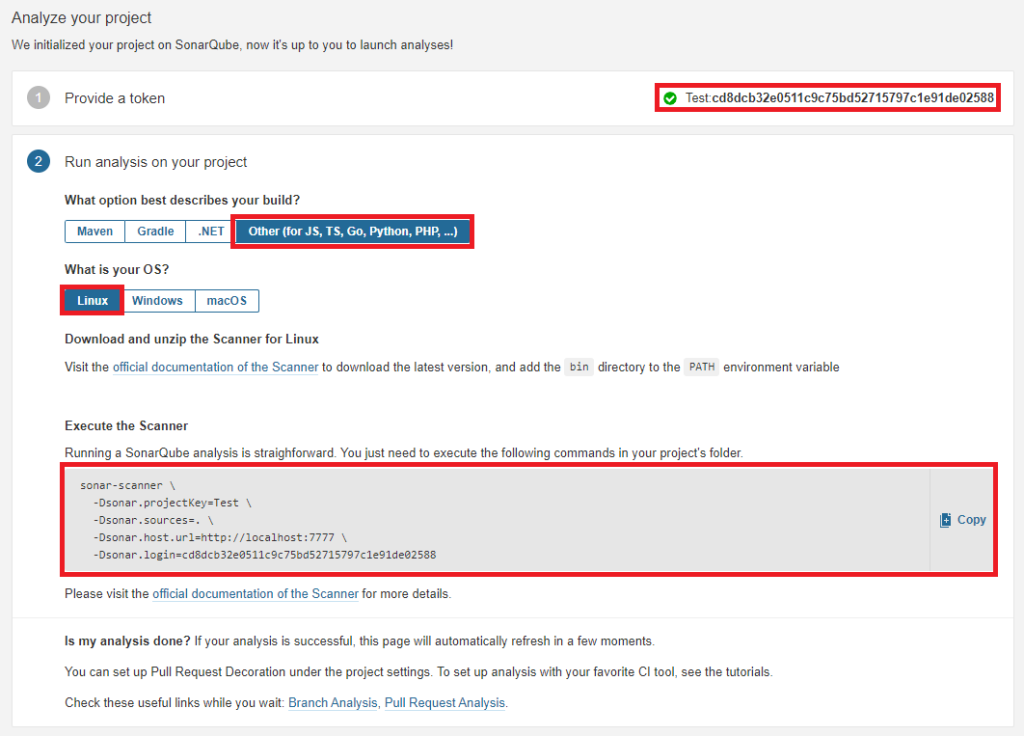
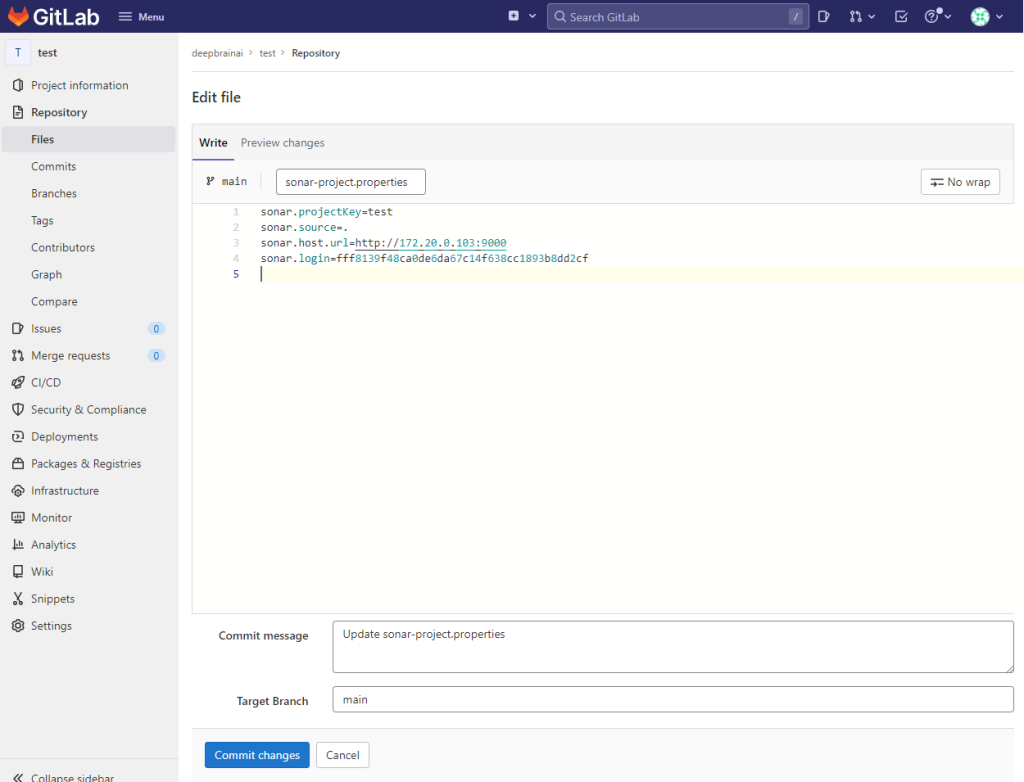
# 생성한 프로젝트명
sonar.projectKey=test
# 소스 경로
sonar.source=.
# 소나큐브 접속 URL
sonar.host.url=http://172.20.0.103:9000
# 생성한 프로젝트 토큰
sonar.login=fff8139f48ca0de6da67c14f638cc1893b8dd2cf
12> Jenkins Item(‘5>’에서 생성)에 Pipline script 작성
git에 소스를 분석하여 소나큐브로 전송
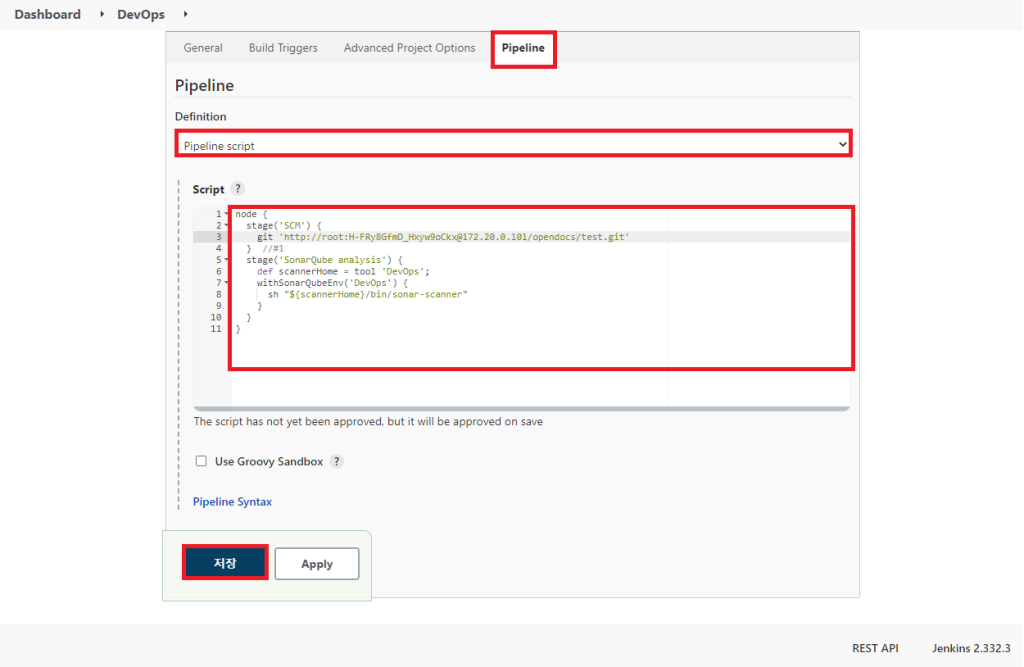
node {
  stage('SCM') {
    ## http://[gitlab 계정]:[gitlab 토큰]@[gitlab 호스트]/[gitlab 프로젝트경로]
    git 'http://root:H-FRy8GfmD_Hxyw9oCkx@172.20.0.101/opendocs/test.git'
  }
  stage('SonarQube analysis') {
    def scannerHome = tool 'DevOps';
    withSonarQubeEnv('DevOps') {
      sh "${scannerHome}/bin/sonar-scanner"
    }
  }
}